

Fall DIYs
DIYs have swept the nation over the past couple of years, from recipes to crazy crafts. Here are a couple fall DIYs that will put you in the autumn mood.
The revolution of DIYs have taken over the nation, sweeping over social media, websites, videos, and blogs. DIYs, or Do-It-Yourselfs, are meant to be crafts or projects that you can, in fact, do yourself. Some DIYs, however, have a reputation of being too complex, confusing, or just an idea that doesn’t work. Here are some DIYs that do follow their namesake, and you’ll be doing them yourself in no time.
Pumpkin Spice Whoopie Pies:
This first DIY is a pumpkin spice whoopie pie recipe. Now, don’t run away, all of you non-bakers, because this recipe only needs 6 ingredients. Yes, you heard correctly. Soon, your house will be filled with the scent of pumpkin goodness, thanks to me (you’re welcome.) First, you’re going to preheat the oven to 350 degrees Fahrenheit. Then 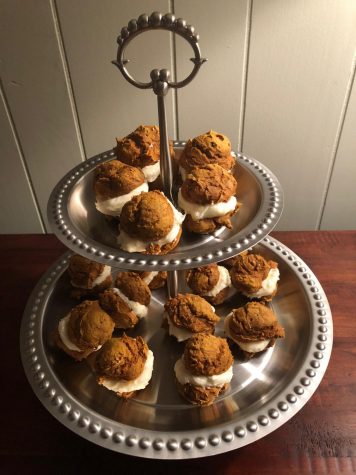 take a box of spice cake mix and a can of pumpkin (both should be about 15 oz, give or take). Mix those together. Feel free to taste some; after all there’s no raw egg in it! Scoop out golf ball size clumps of batter onto a baking sheet lined with parchment paper. Cook for about 14 minutes. When you take them out, press gently on the top of them. If it springs back, it’s done. Now it’s time to make the buttercream frosting. Take out a softener stick of butter, a box of powdered sugar (1 pound), milk, and some vanilla extract. Beat the butter, powdered sugar, 3 tablespoons of milk, and a teaspoon of vanilla. Mix those in. You can add a little bit of milk if you want it a little bit thinner. Don’t overdo it! Add a little bit at a time and taste as you go. Once the whoopie pie cakes are done cooling, spread some frosting in between two cakes. You can set it out for your family or friends, or just eat them yourself (that’s what I did.) See? Easy.
Frankenstein Pumpkin:
This next DIY is a craft. Those of you who aren’t very crafty and artistic: stay with me. This might be easier than it seems. You will require a small white pumpkin (if you can’t find a white one, orange will work fine too, you just might need more coats of paint), but you won’t be carving it – you’ll be painting it. To make these cute Frankenstein pumpkins, you will need black, green, and white paint, a paint brush, and two grey screws (if you don’t have grey ones, you can paint them grey). First, you should take your pumpkin and wash off all dirt/residue, then thoroughly dry it. Next, go ahead and get out your green paint and a paintbrush. Paint the whole pumpkin green (you may need more than one coat of paint to cover the orange if you couldn’t find a white pumpkin), and let it dry completely. Next, take out your white paint and paint two half circles near the top of the pumpkin. Fill them in completely. You may also need to do more than one coat of white. After that, at the top of each half-circle, paint a smaller black half circle. Let the eyes dry. Next, paint little black stitches on each side of the pumpkin, below the eyes. Take more black paint and draw a smile on the bottom of the pumpkin. Lastly, paint the hair on the top of the pumpkin (you may chose to paint the stem black as well as the top of the pumpkin). Let everything dry. Optional: use modge podge to make your pumpkin glossier and smoother. Once everything is dry, take your grey screws and stick one in each side of the pumpkin, and you’re done!
Hopefully these DIYs will get you all geared up for fall, and all the fun things that come along with it. DIYs are an awesome and fun way to spend your free time, and I highly recommend exploring more fall DIYs as the season goes on! Enjoy, and happy crafting!

Hi! I'm Sarah, a sophomore at Oakton, and I am a staff member on the Oakton Outlook. I love to write stories in my free time, and I love to read, mostly...